If you do not already have the Arduino IDE installed on your computer please go to the download page here: http://arduino.cc/en/Main/Software
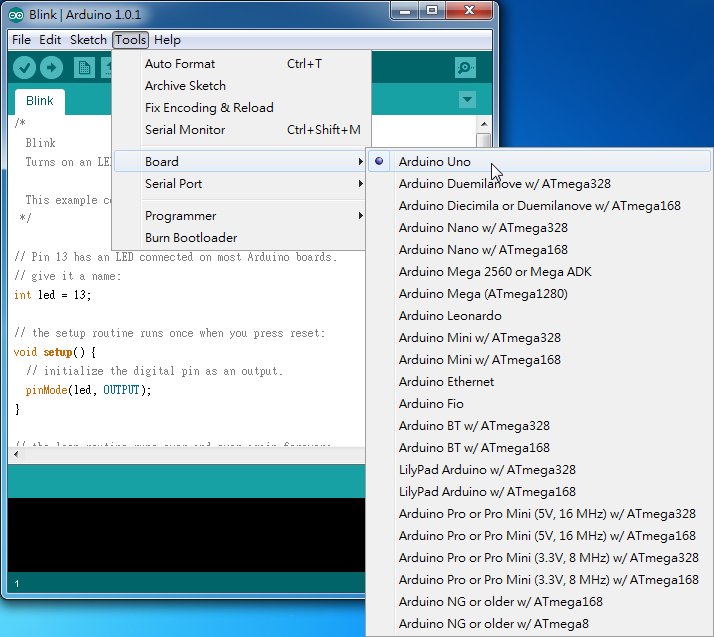
Once you have the Arduino program open go to Tools > Board > Arduino Uno. This sets the board target as the Arduino Uno, this board uses the exact same IC chip as the one included with the letry kits (ATMEGA328) it just does not have a PCB(printed circuit board) attached to it.
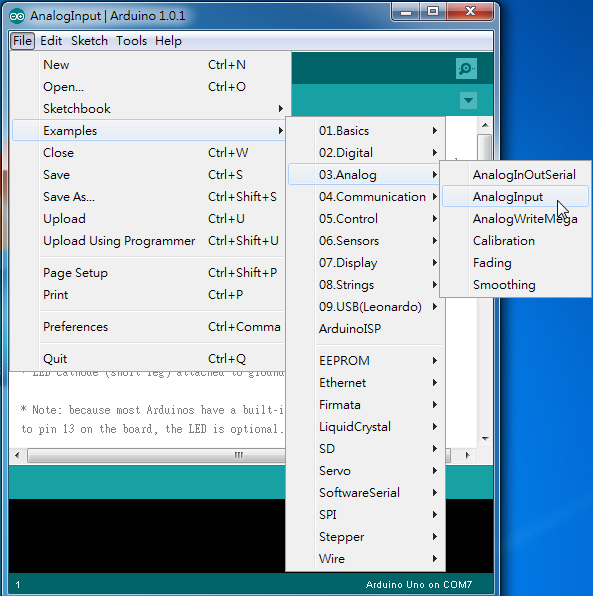
Now go to File > Examples > 03.Analog > AnalogInput and open the file.
The “AnalogInput” program you have just loaded contains the following code:
int sensorPin = A0;    // select the input pin for the potentiometer
int ledPin = 13;      // select the pin for the LED
int sensorValue = 0;  // variable to store the value coming from the sensor

void setup() {
  // declare the ledPin as an OUTPUT:
  pinMode(ledPin, OUTPUT);
}

void loop() {
  // read the value from the sensor:
  sensorValue = analogRead(sensorPin);
  // turn the ledPin on
  digitalWrite(ledPin, HIGH);
  // stop the program for <sensorValue> milliseconds:
  delay(sensorValue);
  // turn the ledPin off:
  digitalWrite(ledPin, LOW);
  // stop the program for for <sensorValue> milliseconds:
  delay(sensorValue);
}
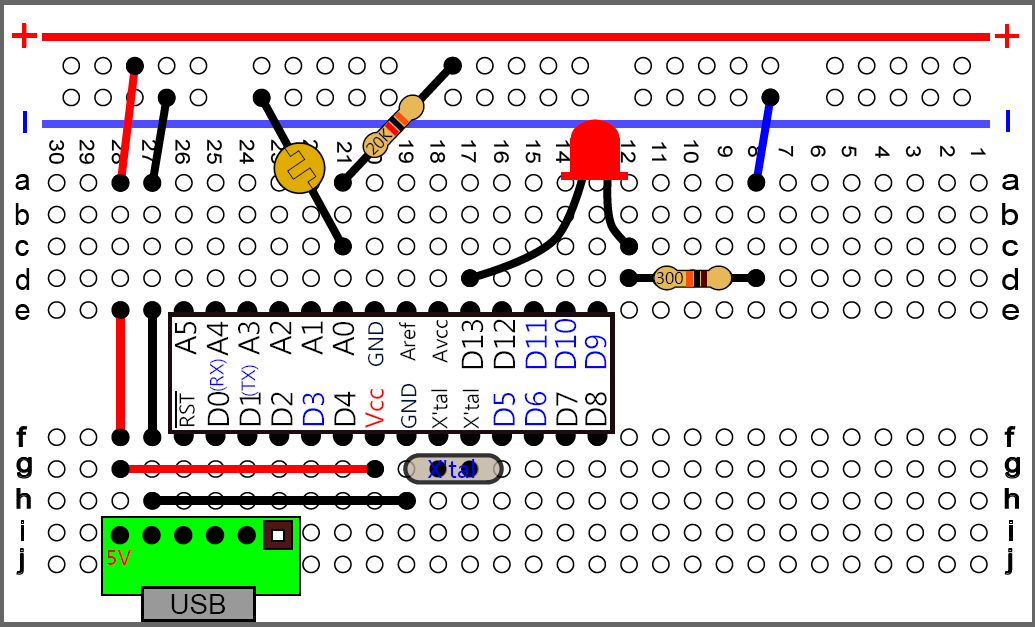
Now you have completed the basic software setup side of things 🙂 what remains is the fun task of wiring up the hardware!
Warning: when inserting and removing large ICs like the ATMEGA328 from the breadboard, keep both sides parallel to the breadboard, sometimes it helps to use a small flat head screw driver to pry up each side evenly when removing. If you pull up only one side at an angle you will bend the pins, potentially breaking them off.